

Indigo Adventures
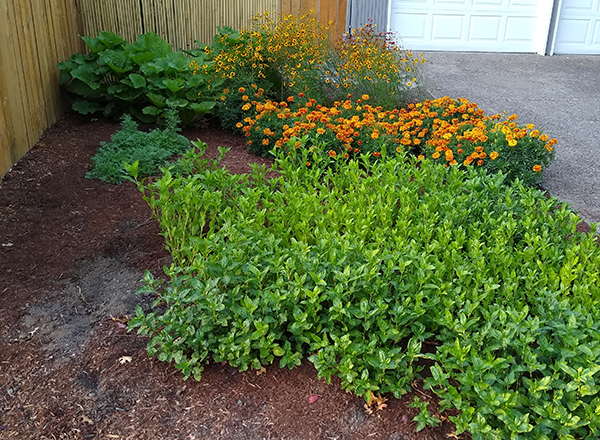
Feeling inspired by the new ETC dye garden, I decided to start a dye garden at home this year. I found seeds for black hollyhock, dyer’s chamomile, coreopsis, marigold, and indigo. Due to ordering late and further mail delays, I started my indigo seed late June. I planted the seeds in trays and kept them outside to sprout and grow to about 2.5 inches long before transplanting. My seed trays did not have individual cells, so I just scooped out clumps of indigo starts like serving a sheet cake. They transplanted well this way, with minimal loss.
Right now, my growing area has a sandy topsoil with clay about 6-12 inches down. I’ve read that indigo likes frequent watering on well-drained soil, so I was cautious of that clay and tried not to overwater. Indigo is a full sun plant, and mine were getting about 6 hours of direct sun mid-day in their location.
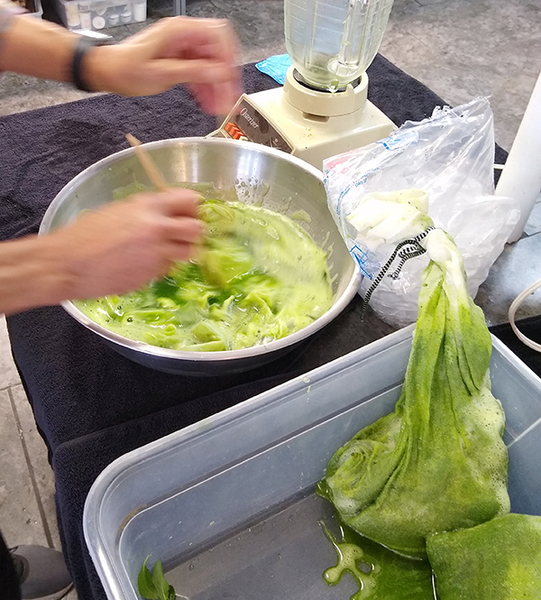
For fresh indigo dying John Marshall recommends harvesting the indigo in the morning and using it right away. His book, Singing the Blues, has been very valuable for me as someone who decided to grow some indigo. Fresh indigo dyeing is likely the simplest way to dye with indigo, but it doesn’t work well with cellulose fibers. With my first attempt to get color from something I grew myself, I was happy to go with a safe bet and use silk scarves.
On the morning in question, I went out and pulled enough of my plants to fill a 3-gallon bucket, as evidenced by the blank spot in my mulch on the left side of my indigo bed. This turned out to be plenty of leaves for my 4 silk scarves. We set my scarves to soak in hot water and synthrapol while we stripped the leaves from the stems. The dye kitchen was set up with towels, large bowls, blenders, mesh bags, gloves, ice, and water. We rinsed out the scarves and started blending ice, water, and indigo leaves. Once the mix was a little foamy, we poured it through the mesh bag and gave it a good squeeze into the bowl. We repeated until we had enough dyebath to submerge the scarves. Then swish for 15 minutes! Chopsticks were a lifesaver for our cold fingers.
By the end of the 15 minutes, we are just starting to see some blue on the fabric. After the dyebath the scarves got a quick rinse in regular water, then hung out to oxidize for about 10 minutes. We repeated the dye process several more times but found the blue color had saturated after the third dip. We also added more blended indigo and ice to keep the dye bath cold and top up the enzymes from the fresh leaves that enable the dye process.
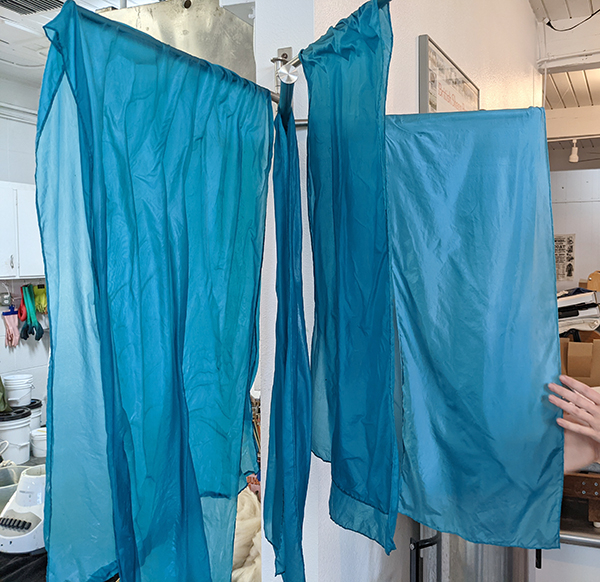
I had so much fun working on this, and it was so easy because all I needed was ice and a blender. I was worried the leaves wouldn’t have much pigment available due to starting late, but the color turned out absolutely great! As you can see, I still have plenty of indigo, so now I’m dreaming of having an outdoor brunch and dye party 😊. I’ll explore drying some of the leaves as well and following some of the many other methods outlined in Singing the Blues. Apparently, you can dye cellulose fibers with fresh indigo if you shift the pH, which will also shift the color to that darker blue. I can’t wait to try it!
~Cameron Fries
Cameron's Indigo Garden
Mixing the fresh indigo
Beautifully blue silk scarves